> ## Documentation Index
> Fetch the complete documentation index at: https://docs.cdp.coinbase.com/llms.txt
> Use this file to discover all available pages before exploring further.
# Gelato Integration
export const TypeScriptConfigRequirement = () => {
return <>
TypeScript users: Set moduleResolution: "node16" or "nodenext" in your tsconfig.json (not the legacy "node") to avoid compilation errors with the CDP SDK.
;
};
Learn how to integrate CDP wallets as a wallet provider with the Gelato Bundler for sponsored user operations.
## Prerequisites
* A free [CDP Portal](https://portal.cdp.coinbase.com) account and project
* [Node.js 22+](https://nodejs.org/en/download)
* A node package manager installed (i.e., `npm`, `pnpm`, or `yarn`)
* Basic familiarity with React and TypeScript
* Configured your domain in CDP Portal (see below)
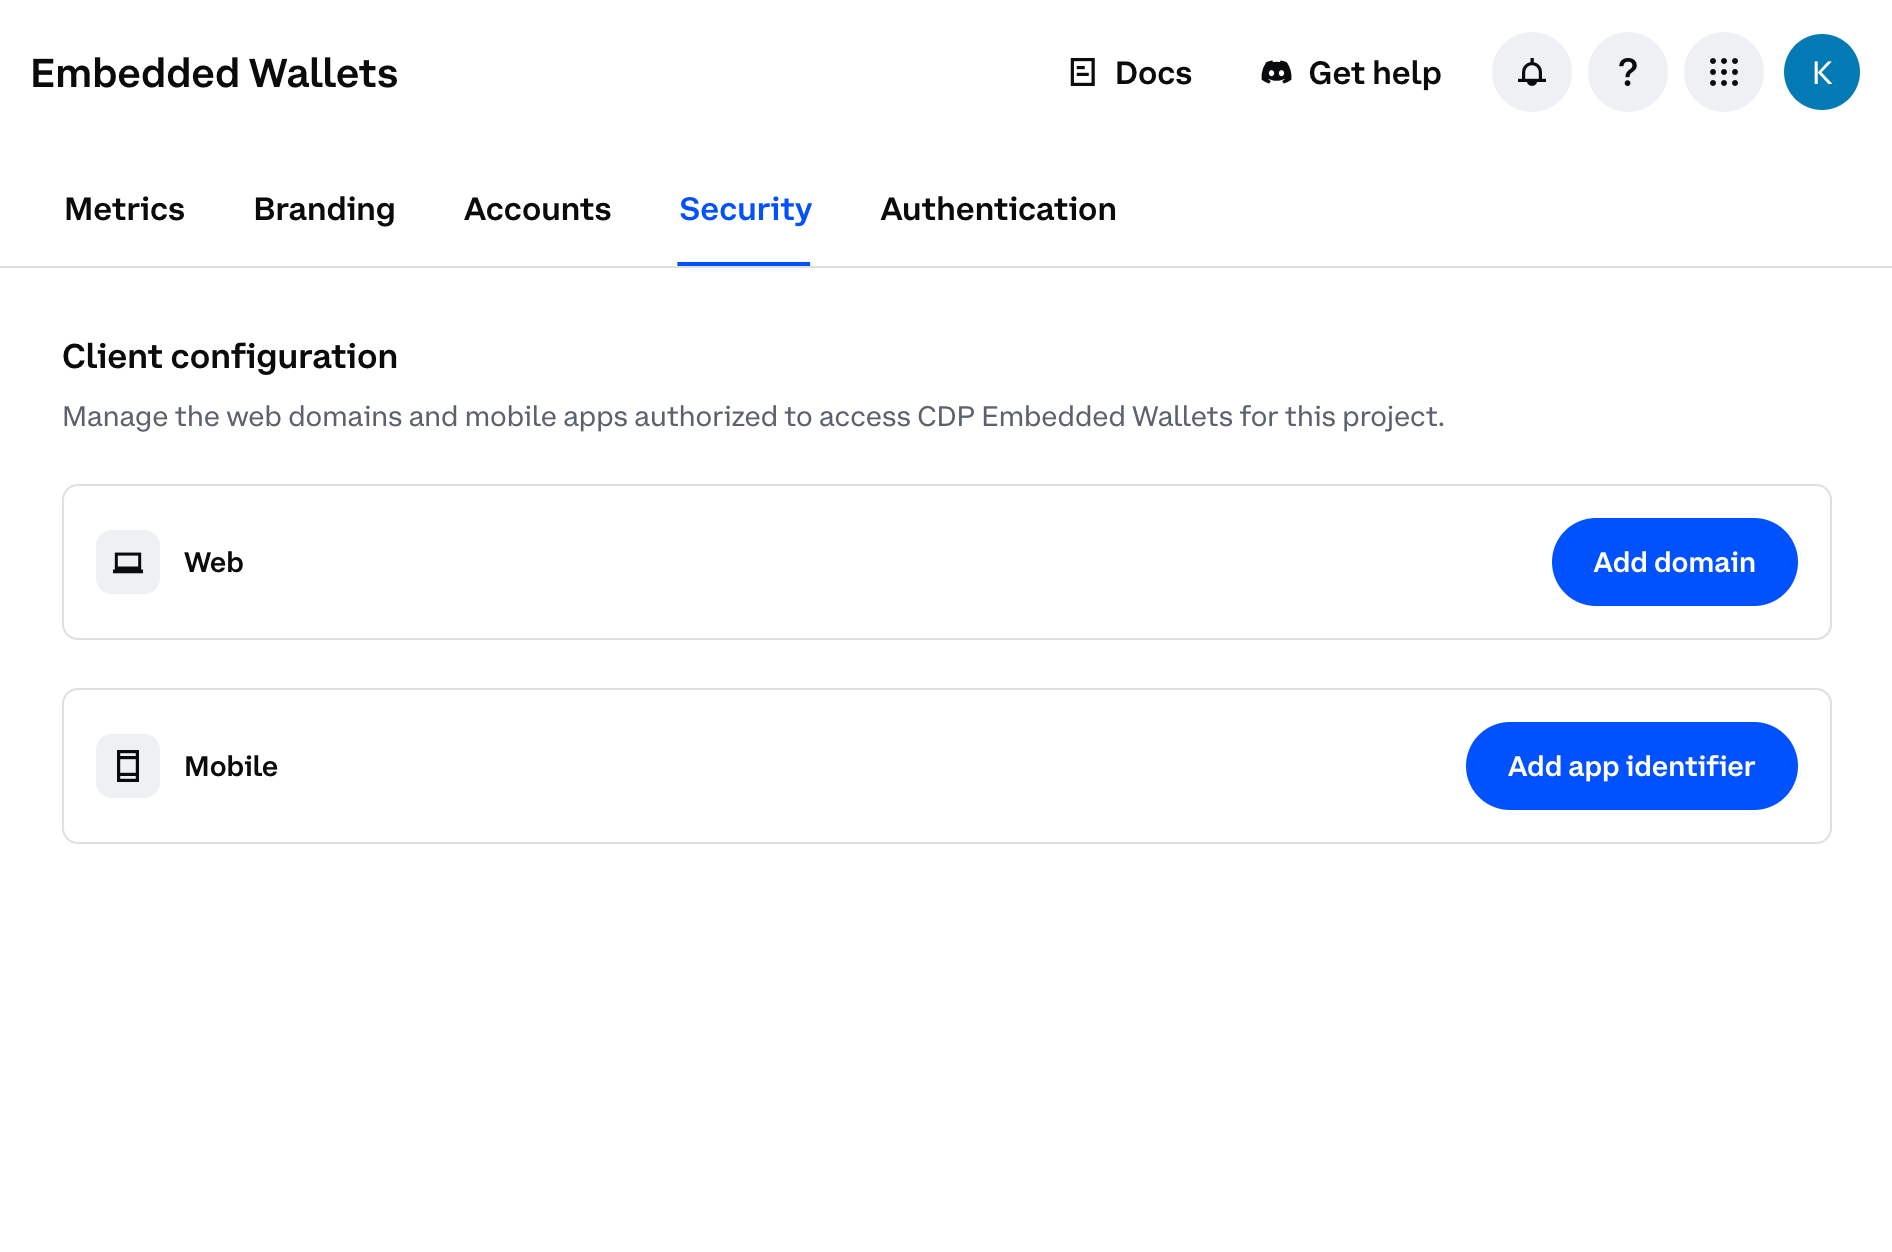
**Step 1: Access CDP Portal**
Navigate to the [Security Configuration](https://portal.cdp.coinbase.com/products/embedded-wallets/security) in CDP Portal, and click **Add domain** to include your local app.
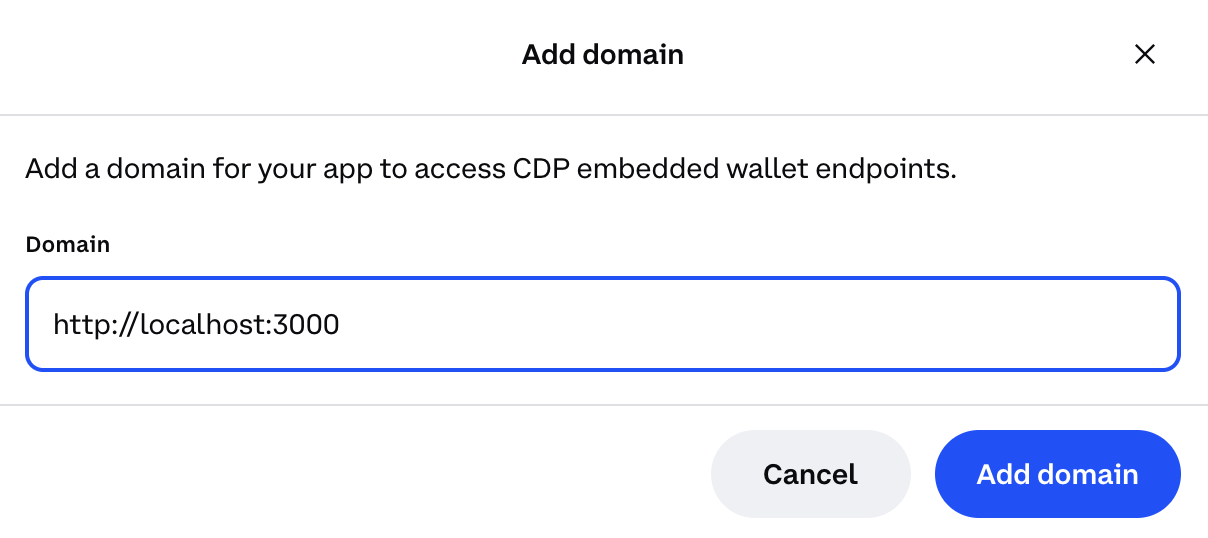
 **Step 2: Add your domain**
* For local development: Use `http://localhost:3000` (or your preferred port)
* For production: Use your actual domain (e.g., `https://yourapp.com`)
**Step 2: Add your domain**
* For local development: Use `http://localhost:3000` (or your preferred port)
* For production: Use your actual domain (e.g., `https://yourapp.com`)
 For production apps, only add your actual production domain. Do not add `localhost` to production CDP projects as malicious apps running locally could impersonate your frontend and abuse your project credentials.
**Step 3: Save your changes**
Click **Add domain** again to save your changes.
For production apps, only add your actual production domain. Do not add `localhost` to production CDP projects as malicious apps running locally could impersonate your frontend and abuse your project credentials.
**Step 3: Save your changes**
Click **Add domain** again to save your changes.
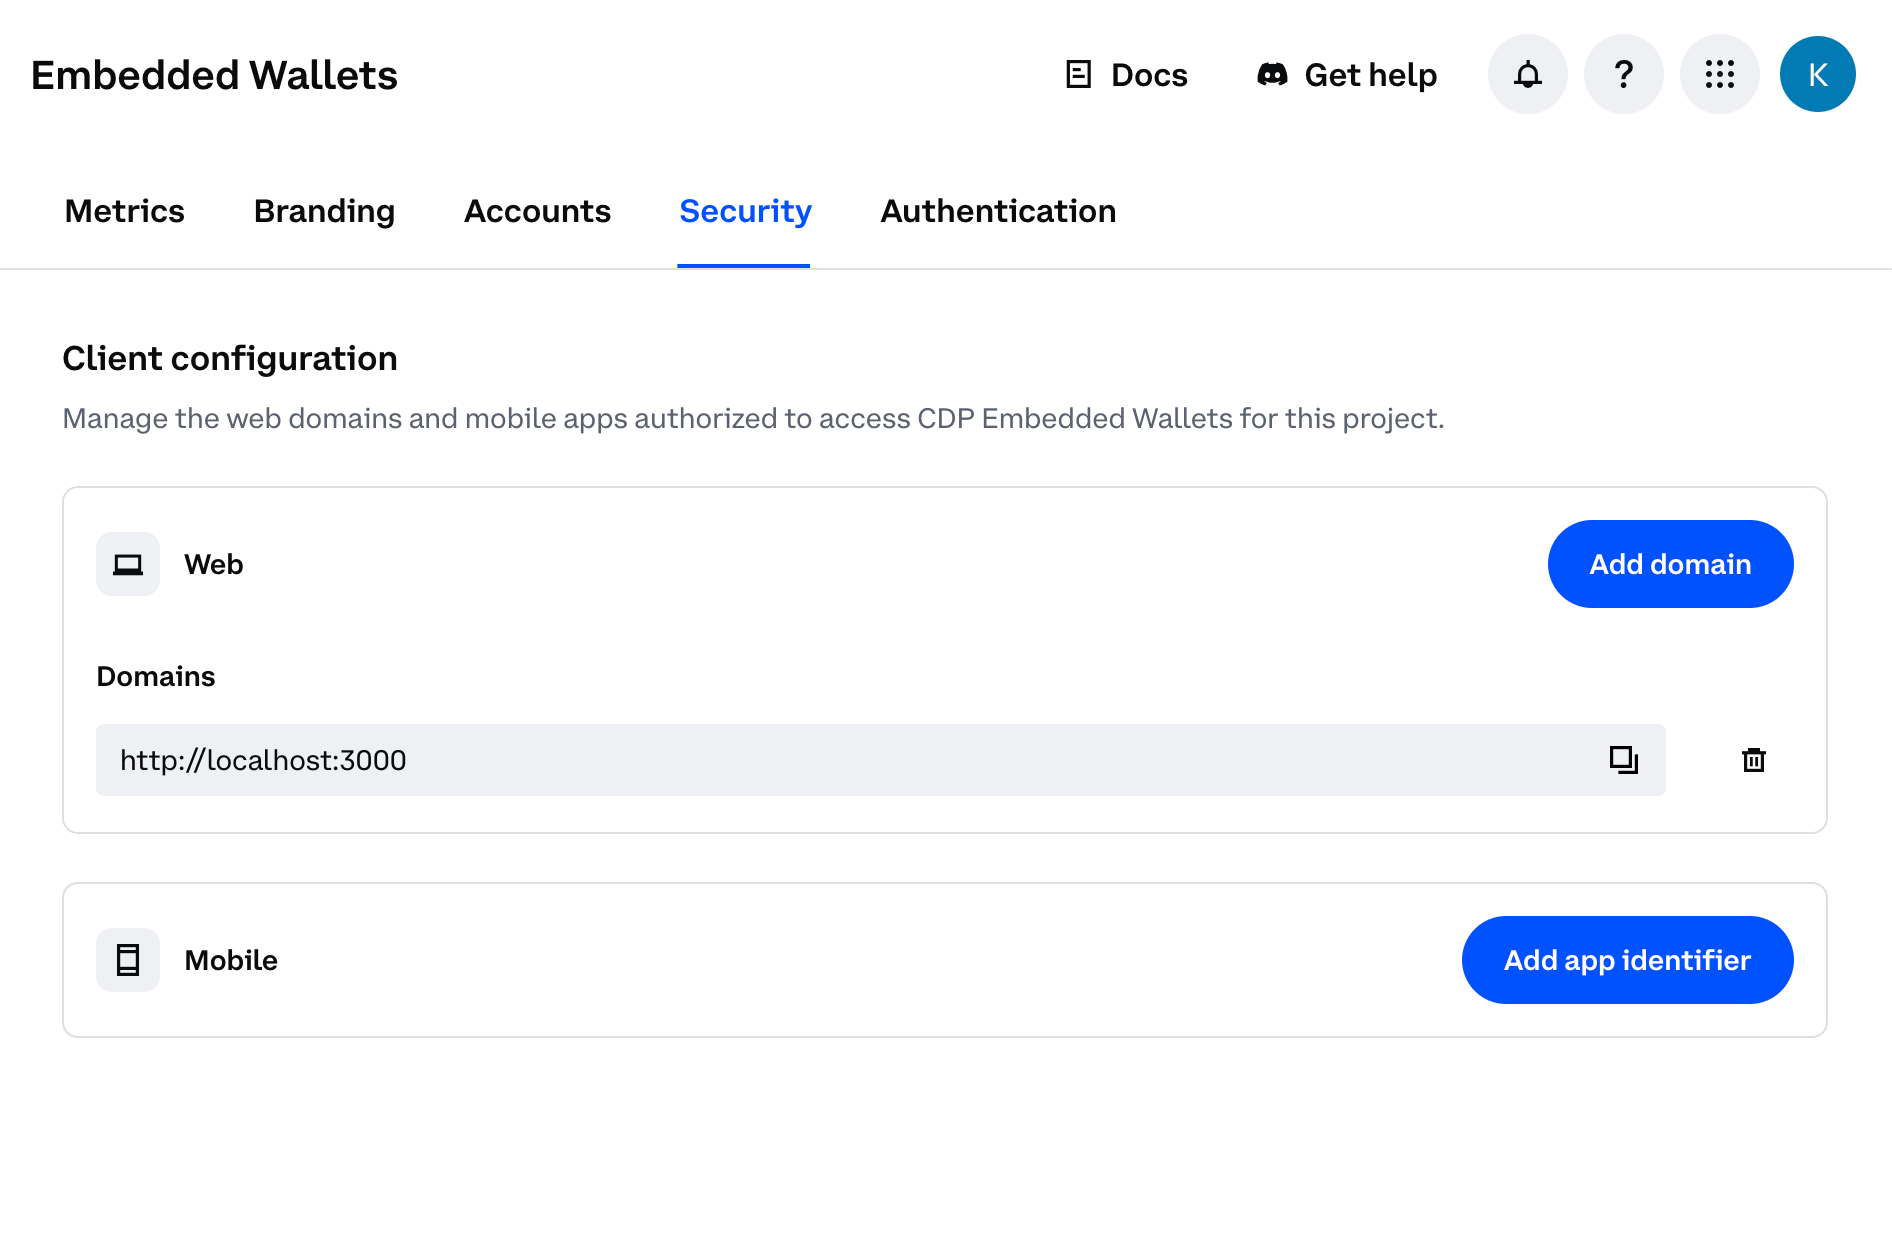 You should see your domain listed in the CDP Portal dashboard. The allowlist will take effect immediately upon saving.
* A [Gelato](https://app.gelato.cloud/) account with an app and API key generated from `Paymaster & Bundler` > `API Keys`
Install the required CDP packages:
```bash theme={null}
# npm
npm install @coinbase/cdp-react @coinbase/cdp-hooks @coinbase/cdp-core viem
```
Set the environment variables in your .env.local file:
```bash theme={null}
NEXT_PUBLIC_PROJECT_ID=your_coinbase_cdp_project_id
NEXT_PUBLIC_GELATO_API_KEY=your_gelato_api_key
```
```tsx src/App.tsx theme={null}
import { CDPReactProvider } from "@coinbase/cdp-react";
import { AuthButton } from "@coinbase/cdp-react/components/AuthButton";
import { useCurrentUser, useEvmAddress } from "@coinbase/cdp-hooks";
import { toViemAccount } from "@coinbase/cdp-core";
import { baseSepolia } from "viem/chains";
import { createPublicClient, http } from "viem";
import {
createBundlerClient,
toCoinbaseSmartAccount,
} from "viem/account-abstraction";
```
Set up the CDP React Provider in your app:
```tsx src/App.tsx theme={null}
"use client";
import { CDPReactProvider } from "@coinbase/cdp-react";
function Providers({ children }: { children: React.ReactNode }) {
return (
{children}
);
}
```
Set up your component to use Coinbase CDP hooks and create a bundler client with Gelato integration:
```tsx src/App.tsx theme={null}
"use client";
import { AuthButton } from "@coinbase/cdp-react/components/AuthButton";
import { useCurrentUser, useEvmAddress } from "@coinbase/cdp-hooks";
import { toViemAccount } from "@coinbase/cdp-core";
import { baseSepolia } from "viem/chains";
import { createPublicClient, http } from "viem";
import {
createBundlerClient,
toCoinbaseSmartAccount,
} from "viem/account-abstraction";
export default function Home() {
const { evmAddress } = useEvmAddress();
const { currentUser } = useCurrentUser();
const createAccount = async () => {
if (!currentUser?.evmAccounts) return;
const viemAccount = await toViemAccount(currentUser?.evmAccounts[0]);
const client = createPublicClient({
chain: baseSepolia,
transport: http(),
});
const account = await toCoinbaseSmartAccount({
client,
owners: [viemAccount],
version: "1.1",
});
const bundlerClient = createBundlerClient({
client: client,
transport: http(
`https://api.gelato.digital/bundlers/${baseSepolia.id}/rpc?apiKey=${process.env.NEXT_PUBLIC_GELATO_API_KEY}&sponsored=true`
),
});
console.log("Bundler client created:", bundlerClient);
console.log("Smart account address:", account.address);
};
return (
You should see your domain listed in the CDP Portal dashboard. The allowlist will take effect immediately upon saving.
* A [Gelato](https://app.gelato.cloud/) account with an app and API key generated from `Paymaster & Bundler` > `API Keys`
Install the required CDP packages:
```bash theme={null}
# npm
npm install @coinbase/cdp-react @coinbase/cdp-hooks @coinbase/cdp-core viem
```
Set the environment variables in your .env.local file:
```bash theme={null}
NEXT_PUBLIC_PROJECT_ID=your_coinbase_cdp_project_id
NEXT_PUBLIC_GELATO_API_KEY=your_gelato_api_key
```
```tsx src/App.tsx theme={null}
import { CDPReactProvider } from "@coinbase/cdp-react";
import { AuthButton } from "@coinbase/cdp-react/components/AuthButton";
import { useCurrentUser, useEvmAddress } from "@coinbase/cdp-hooks";
import { toViemAccount } from "@coinbase/cdp-core";
import { baseSepolia } from "viem/chains";
import { createPublicClient, http } from "viem";
import {
createBundlerClient,
toCoinbaseSmartAccount,
} from "viem/account-abstraction";
```
Set up the CDP React Provider in your app:
```tsx src/App.tsx theme={null}
"use client";
import { CDPReactProvider } from "@coinbase/cdp-react";
function Providers({ children }: { children: React.ReactNode }) {
return (
{children}
);
}
```
Set up your component to use Coinbase CDP hooks and create a bundler client with Gelato integration:
```tsx src/App.tsx theme={null}
"use client";
import { AuthButton } from "@coinbase/cdp-react/components/AuthButton";
import { useCurrentUser, useEvmAddress } from "@coinbase/cdp-hooks";
import { toViemAccount } from "@coinbase/cdp-core";
import { baseSepolia } from "viem/chains";
import { createPublicClient, http } from "viem";
import {
createBundlerClient,
toCoinbaseSmartAccount,
} from "viem/account-abstraction";
export default function Home() {
const { evmAddress } = useEvmAddress();
const { currentUser } = useCurrentUser();
const createAccount = async () => {
if (!currentUser?.evmAccounts) return;
const viemAccount = await toViemAccount(currentUser?.evmAccounts[0]);
const client = createPublicClient({
chain: baseSepolia,
transport: http(),
});
const account = await toCoinbaseSmartAccount({
client,
owners: [viemAccount],
version: "1.1",
});
const bundlerClient = createBundlerClient({
client: client,
transport: http(
`https://api.gelato.digital/bundlers/${baseSepolia.id}/rpc?apiKey=${process.env.NEXT_PUBLIC_GELATO_API_KEY}&sponsored=true`
),
});
console.log("Bundler client created:", bundlerClient);
console.log("Smart account address:", account.address);
};
return (
{evmAddress}
);
}
```
Send sponsored user operations using the bundler client:
```tsx src/App.tsx theme={null}
const sendUserOperation = async () => {
const response = await bundlerClient.sendUserOperation({
account,
calls: [
{
to: account.address,
value: BigInt(0),
data: "0x",
},
],
maxFeePerGas: BigInt(0),
maxPriorityFeePerGas: BigInt(0),
});
console.log("User operation response:", response);
};
```