Learn how to integrate Coinbase Embedded Wallets as a wallet provider with the Gelato Bundler for sponsored user operations.

Prerequisites

  • A free CDP Portal account and project
  • Node.js 22+
  • A node package manager installed (i.e., npm, pnpm, or yarn)
  • Basic familiarity with React and TypeScript
  • Configured your domain in CDP Portal (see below)
Step 1: Access CDP PortalNavigate to the Domains Configuration in CDP Portal, and click Add domain to include your local app.
Add domain dialog in CDP Portal
Step 2: Add your domain
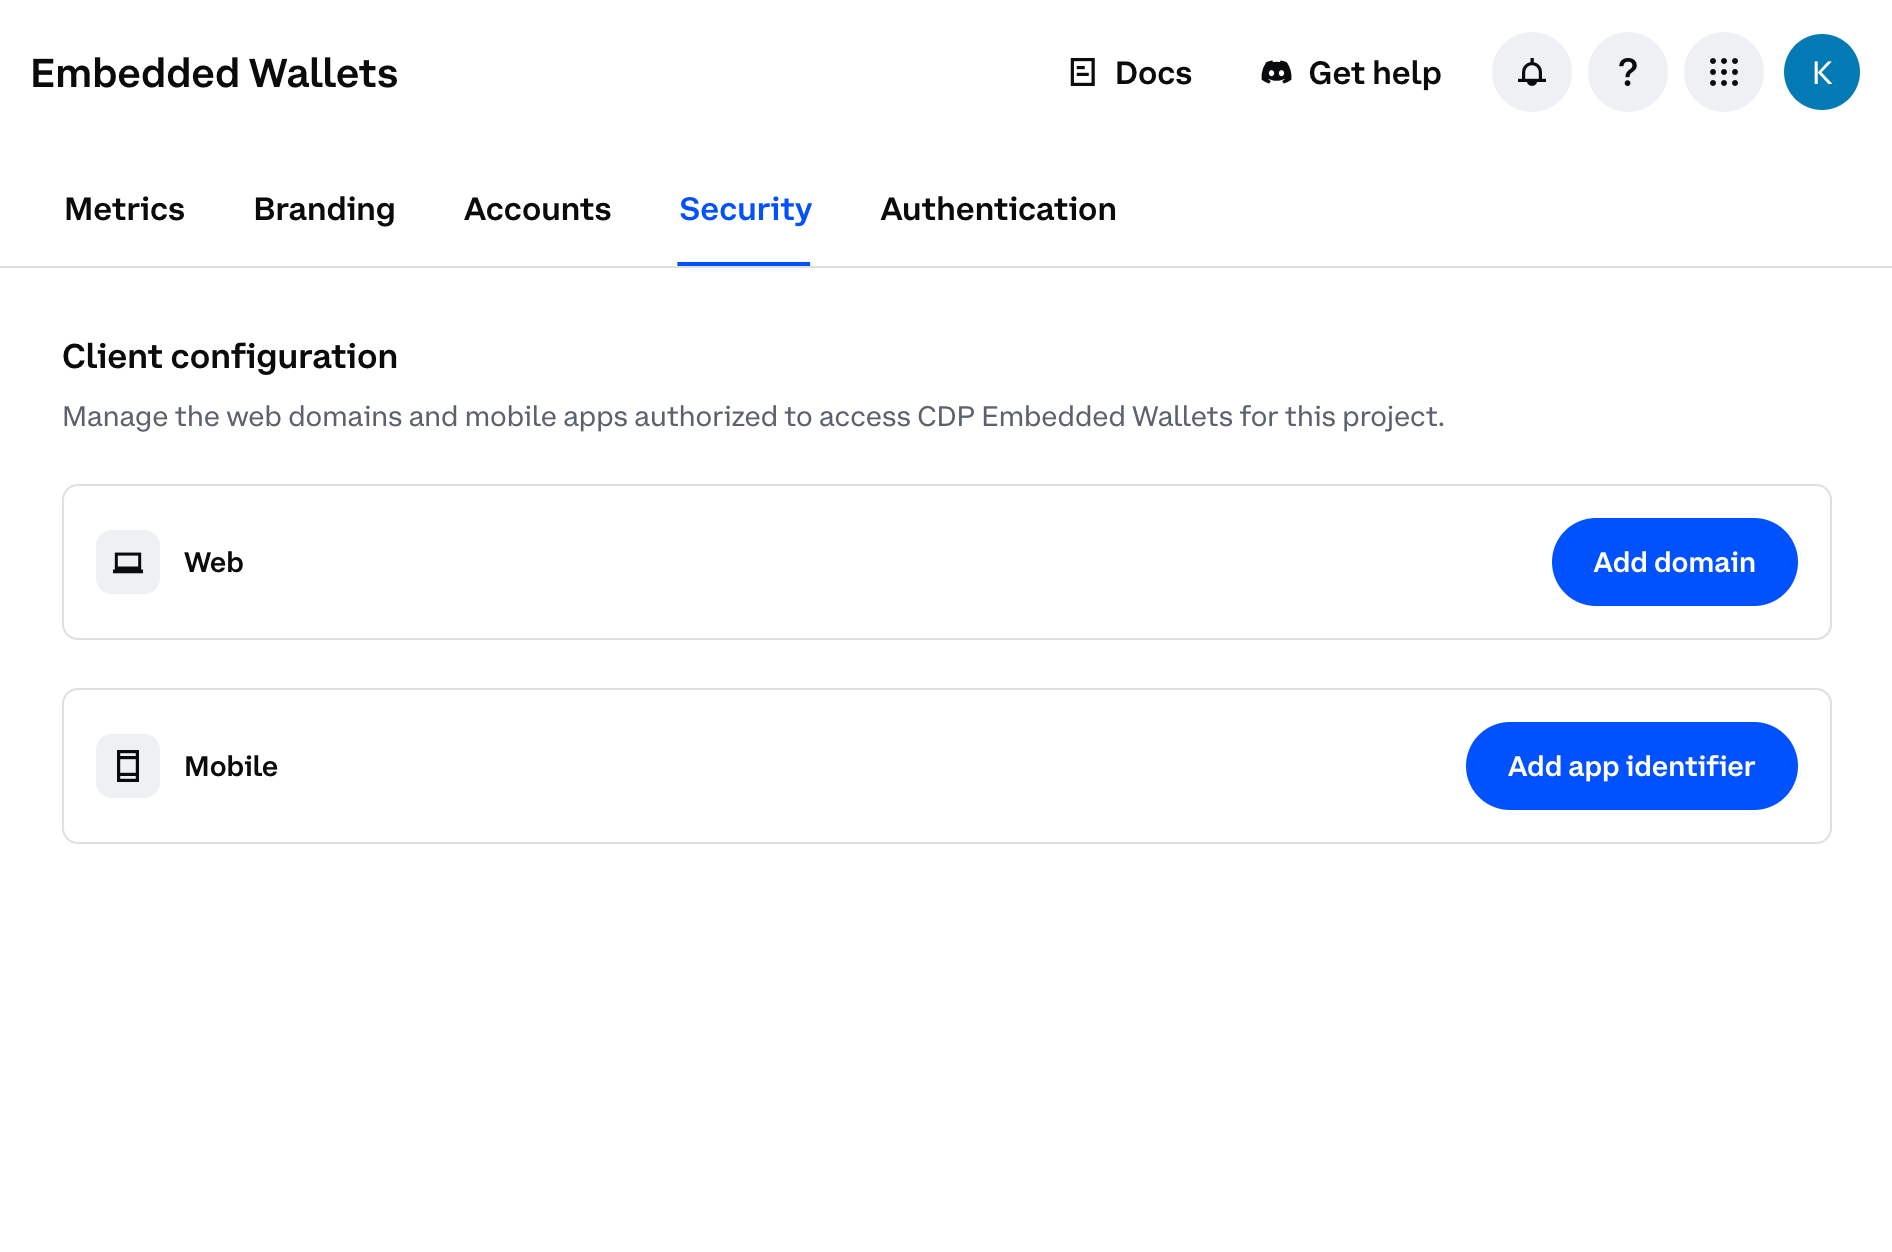
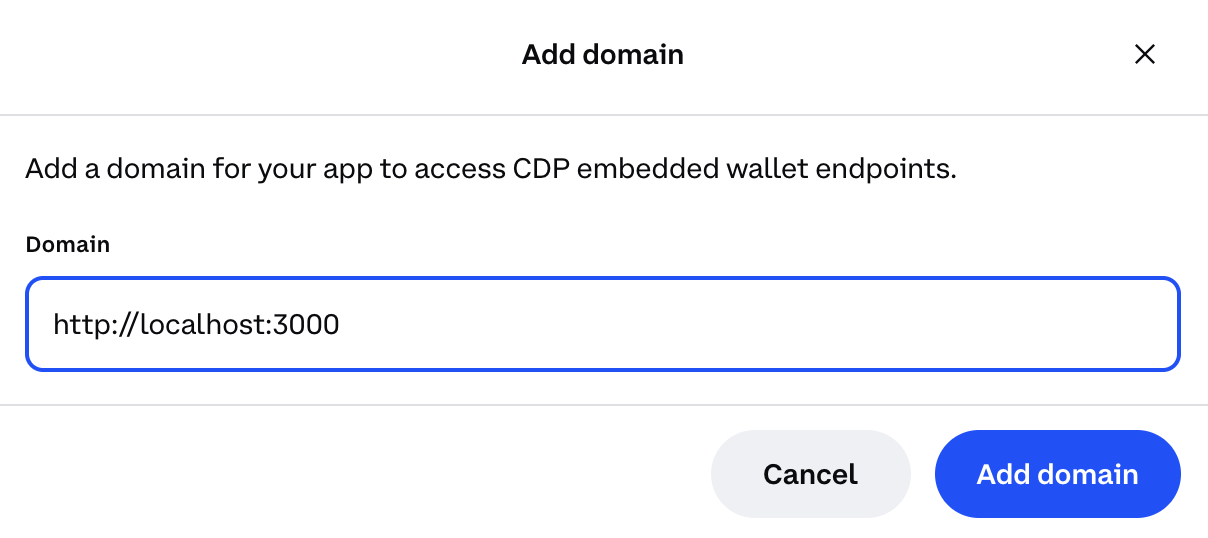
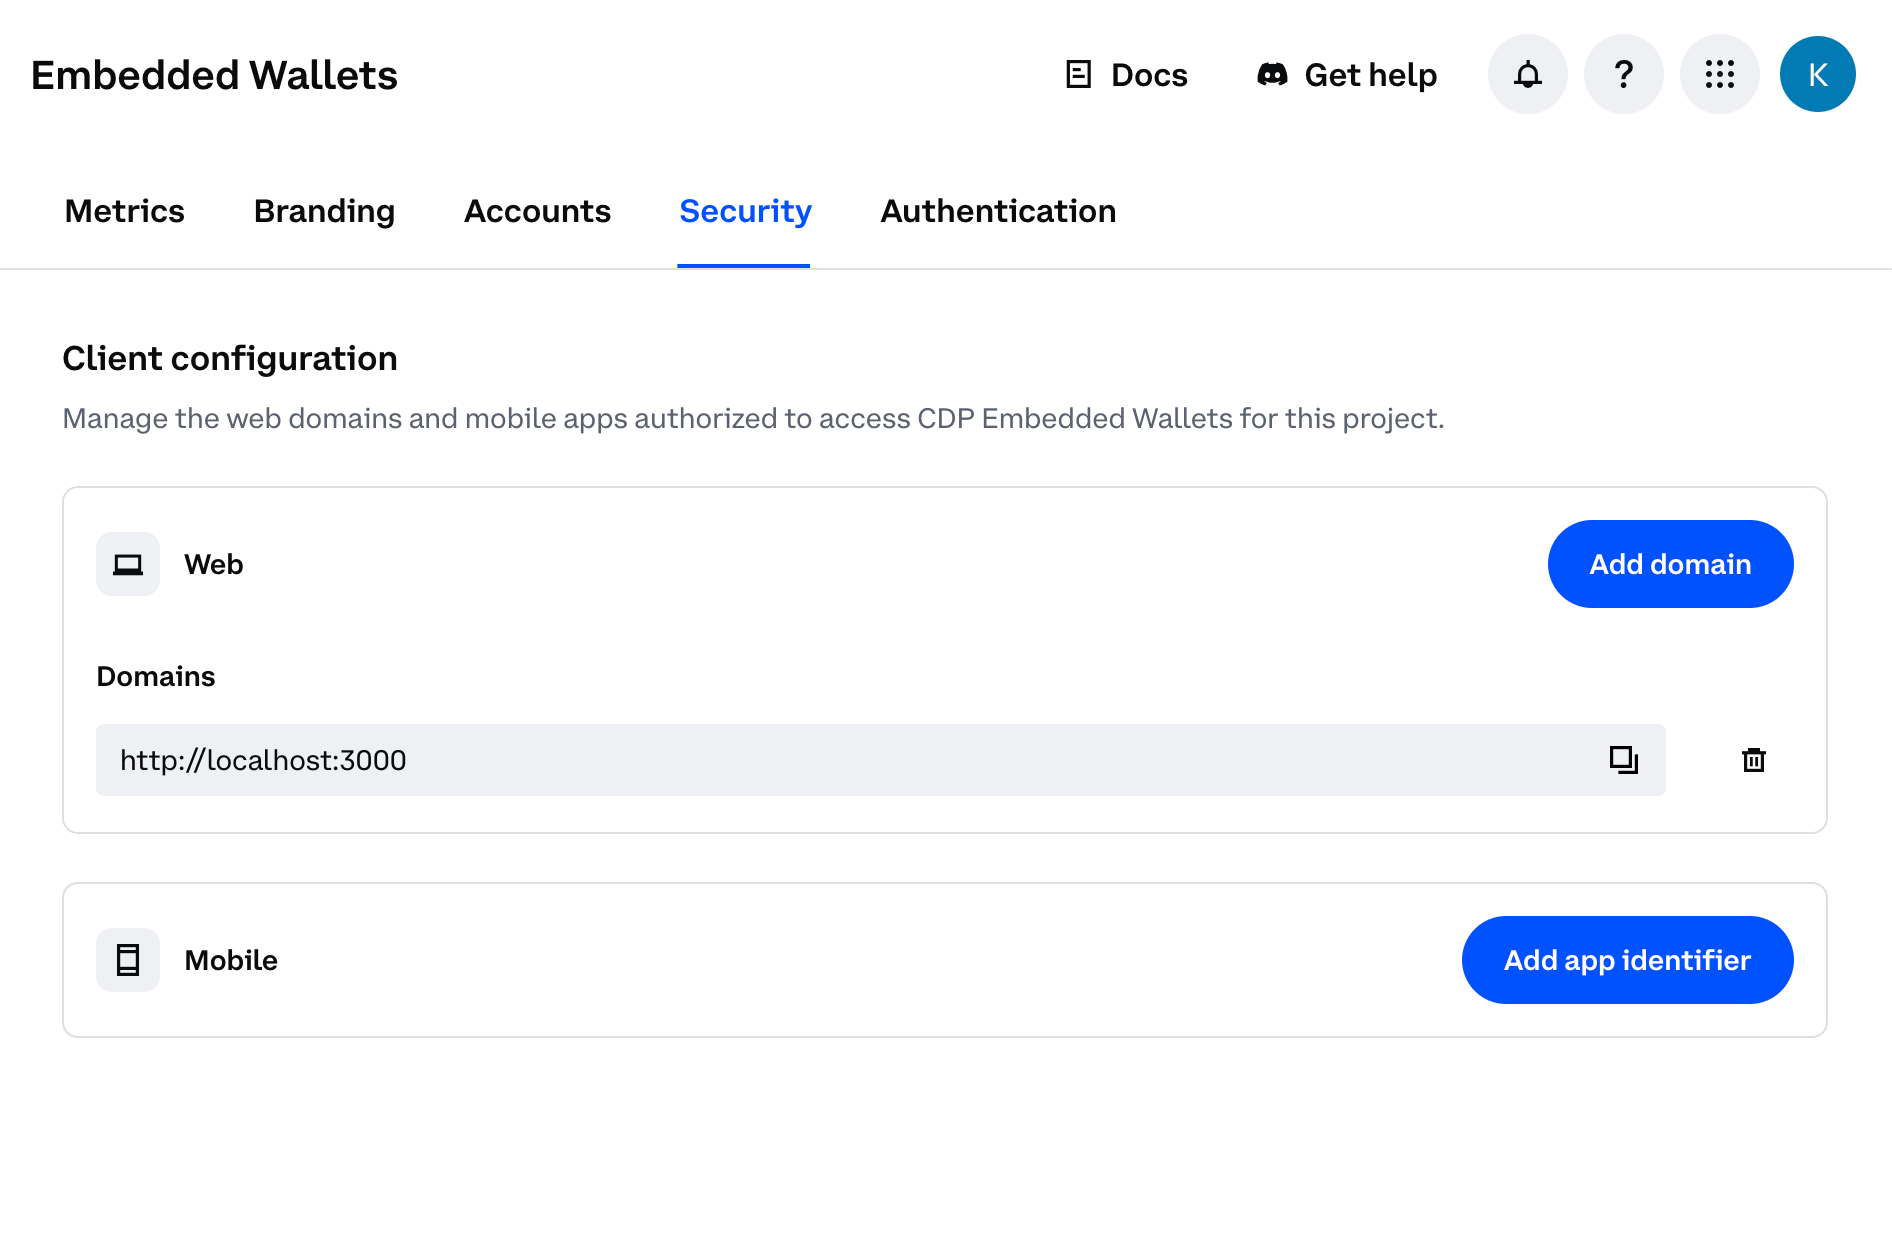
  • For local development: Use http://localhost:3000 (or your preferred port)
  • For production: Use your actual domain (e.g., https://yourapp.com)
Domain configuration with localhost
For production apps, only add your actual production domain. Do not add localhost to production CDP projects as malicious apps running locally could impersonate your frontend and abuse your project credentials.
Step 3: Save your changesClick Add domain again to save your changes.
Domain configuration saved in CDP Portal
You should see your domain listed in the CDP Portal dashboard. The allowlist will take effect immediately upon saving.
TypeScript users: Set moduleResolution: "node16" or "nodenext" in your tsconfig.json (not the legacy "node") to avoid compilation errors with the CDP SDK.
  • A Gelato account with an app and API key generated from Paymaster & Bundler > API Keys
Install the required CDP packages:
# npm
npm install @coinbase/cdp-react @coinbase/cdp-hooks @coinbase/cdp-core viem
1

Set up .env file

Set the environment variables in your .env.local file:
NEXT_PUBLIC_PROJECT_ID=your_coinbase_cdp_project_id
NEXT_PUBLIC_GELATO_API_KEY=your_gelato_api_key
2

Import Dependencies

src/App.tsx
import { CDPReactProvider } from "@coinbase/cdp-react";
import { AuthButton } from "@coinbase/cdp-react/components/AuthButton";
import { useCurrentUser, useEvmAddress } from "@coinbase/cdp-hooks";
import { toViemAccount } from "@coinbase/cdp-core";
import { baseSepolia } from "viem/chains";
import { createPublicClient, http } from "viem";
import {
  createBundlerClient,
  toCoinbaseSmartAccount,
} from "viem/account-abstraction";
3

Configure React provider

Set up the CDP React Provider in your app:
src/App.tsx
"use client";

import { CDPReactProvider } from "@coinbase/cdp-react";

function Providers({ children }: { children: React.ReactNode }) {
  return (
    <CDPReactProvider
      config={{
        projectId: process.env.NEXT_PUBLIC_PROJECT_ID as string,
        ethereum: {
          createOnLogin: "eoa",
        },
        appName: "Your App Name",
      }}
    >
      {children}
    </CDPReactProvider>
  );
}
4

Create Bundler Client

Set up your component to use Coinbase CDP hooks and create a bundler client with Gelato integration:
src/App.tsx
"use client";

import { AuthButton } from "@coinbase/cdp-react/components/AuthButton";
import { useCurrentUser, useEvmAddress } from "@coinbase/cdp-hooks";
import { toViemAccount } from "@coinbase/cdp-core";
import { baseSepolia } from "viem/chains";
import { createPublicClient, http } from "viem";
import {
  createBundlerClient,
  toCoinbaseSmartAccount,
} from "viem/account-abstraction";

export default function Home() {
  const { evmAddress } = useEvmAddress();
  const { currentUser } = useCurrentUser();

  const createAccount = async () => {
    if (!currentUser?.evmAccounts) return;

    const viemAccount = await toViemAccount(currentUser?.evmAccounts[0]);

    const client = createPublicClient({
      chain: baseSepolia,
      transport: http(),
    });

    const account = await toCoinbaseSmartAccount({
      client,
      owners: [viemAccount],
      version: "1.1",
    });

    const bundlerClient = createBundlerClient({
      client: client,
      transport: http(
        `https://api.gelato.digital/bundlers/${baseSepolia.id}/rpc?apiKey=${process.env.NEXT_PUBLIC_GELATO_API_KEY}&sponsored=true`
      ),
    });

    console.log("Bundler client created:", bundlerClient);
    console.log("Smart account address:", account.address);
  };

  return (
    <div>
      <AuthButton />
      <div>{evmAddress}</div>
      <button onClick={createAccount}>Create Account</button>
    </div>
  );
}
5

Send User Operations

Send sponsored user operations using the bundler client:
src/App.tsx
const sendUserOperation = async () => {
  const response = await bundlerClient.sendUserOperation({
    account,
    calls: [
      {
        to: account.address,
        value: BigInt(0),
        data: "0x",
      },
    ],
    maxFeePerGas: BigInt(0),
    maxPriorityFeePerGas: BigInt(0),
  });

  console.log("User operation response:", response);
};