This guide will show you how to create a faucet request and claim testnet funds within minutes. You will:
  • Create a wallet and a faucet request for each supported token standard
  • Claim testnet funds onchain
  • Return faucet transaction information and verify wallet balance(s)

Prerequisites

For UI (CDP Portal) option:

For programmatic option:

If you’re following the programmatic examples below, you should have your API key and wallet secret ready to initialize the CDP client.

UI (CDP Portal)

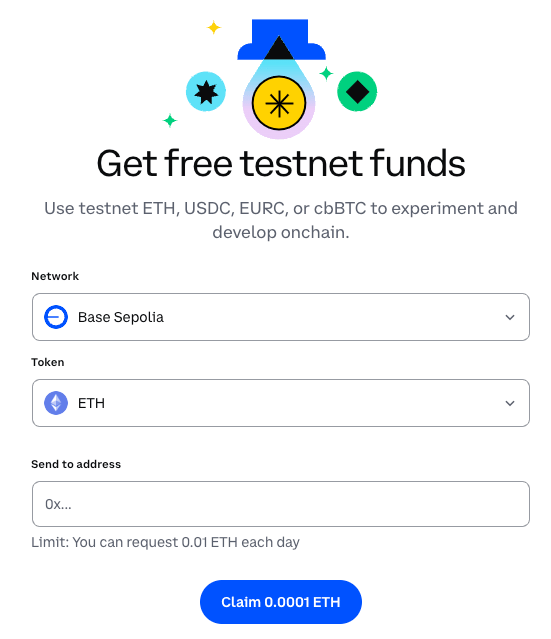
While the CDP Faucets API allows for programmatic faucet requests, you can also use the CDP Portal UI with a wallet address to claim funds in-browser. Assuming you completed the prerequisites, navigate to Faucets.
  1. Select a Network (either Base Sepolia, Ethereum Sepolia, or Solana Devnet).
  2. Select a Token (either ETH, USDC, EURC, cbBTC, or SOL).
  3. Enter a wallet address and click the Claim button.
Continue reading to programmatically claim testnet funds.

Programmatically

The majority of this quickstart will focus on claiming faucet funds using a new account created using our Server Wallet v2. If you’d like to use your own wallet, skip to Step 4: Use an external address.

1. Setup CDP client and create an account

First, initialize the CDP client and create an account. Add your CDP API key and wallet secret to your environment:
Create a .env file with your credentials:
.env
CDP_API_KEY_ID=your-api-key-id
CDP_API_KEY_SECRET=your-api-key-secret
CDP_WALLET_SECRET=your-wallet-secret
Install dependencies and create an account:
import { CdpClient } from "@coinbase/cdp-sdk";
import dotenv from "dotenv";

dotenv.config();

const cdp = new CdpClient();

// Create an EVM account on Base Sepolia (default)
const account = await cdp.evm.createAccount();
console.log(`Created account: ${account.address}`);
Accounts are created for Base Sepolia by default. You can specify other EVM networks when making faucet requests.

2. Claim ETH from faucet

Continue reading to create an ETH faucet request.
ETH claim limits are capped at 1000 claims per every 24 hours at 0.0001 ETH per claim.
import { CdpClient } from "@coinbase/cdp-sdk";
import dotenv from "dotenv";

dotenv.config();

const cdp = new CdpClient();

// Create an account
const account = await cdp.evm.createAccount();
console.log(`Created account: ${account.address}`);

// Request ETH from faucet
const faucetResponse = await cdp.evm.requestFaucet({
  address: account.address,
  network: "base-sepolia",
  token: "eth"
});

console.log(`ETH faucet transaction: https://sepolia.basescan.org/tx/${faucetResponse.transactionHash}`);
After running this example, you should see output similar to the following:
Created account: 0x3c0D84055994c3062819Ce8730869D0aDeA4c3Bf
ETH faucet transaction: https://sepolia.basescan.org/tx/0xd2ef7e373f99cc7deafa4e214c1cdac533d1a9b743106b62a33daebd05fb2b37

3. Claim ERC-20 token from faucet

Continue reading to create a request for (and claim) ERC-20 funds from a faucet.
ERC-20 claim limits are capped every 24 hours dependent on token symbol.
After creating your account, request faucet funds for ERC-20 tokens by specifying the token type.
import { CdpClient } from "@coinbase/cdp-sdk";
import dotenv from "dotenv";

dotenv.config();

const cdp = new CdpClient();

// Create an account
const account = await cdp.evm.createAccount();
console.log(`Created account: ${account.address}`);

// Request USDC from faucet
const usdcFaucetResponse = await cdp.evm.requestFaucet({
  address: account.address,
  network: "base-sepolia",
  token: "usdc"
});

// Request cbBTC from faucet
const cbbtcFaucetResponse = await cdp.evm.requestFaucet({
  address: account.address,
  network: "base-sepolia",
  token: "cbbtc"
});

console.log("Faucet Transactions successfully completed:");
console.log(`USDC transaction: https://sepolia.basescan.org/tx/${usdcFaucetResponse.transactionHash}`);
console.log(`cbBTC transaction: https://sepolia.basescan.org/tx/${cbbtcFaucetResponse.transactionHash}`);
After running this example, you should see output similar to the following:
Created account: 0x3c0D84055994c3062819Ce8730869D0aDeA4c3Bf
Faucet Transactions successfully completed:
USDC transaction: https://sepolia.basescan.org/tx/0xc52f4578e487d12ff92b44fa3d9a21b6dfca772e05df5f0b723f2751178fe289
cbBTC transaction: https://sepolia.basescan.org/tx/0xdec3164e59ae53d616dbdebabf8bfac914a619160edd0344dca8d758d09491c0

4. Use an external address (optional)

You can also use your own wallet address to claim faucet funds directly. Simply provide your address to the faucet request.
import { CdpClient } from "@coinbase/cdp-sdk";
import dotenv from "dotenv";

dotenv.config();

const cdp = new CdpClient();

// Replace with your own wallet address
const externalAddress = "0x...";

// Request ETH from faucet for external address
const faucetResponse = await cdp.evm.requestFaucet({
  address: externalAddress,
  network: "base-sepolia",
  token: "eth"
});

console.log(`ETH faucet transaction: https://sepolia.basescan.org/tx/${faucetResponse.transactionHash}`);
You can monitor the transaction status by checking the blockchain explorer link provided in the response.
After running this example, you should see output similar to the following:
ETH faucet transaction: https://sepolia.basescan.org/tx/0xde2142cb2de6841b26160d2cff5ceb5acdaf4de30cbd58d4b607ab07a3e0bae5

Video: Watch and learn

Watch this video for a walkthrough of using faucets in CDP Portal: